Setting Default Printer Settings (Mac)
This Ricoh Printer Driver Tutorial will guide you step by step through the best way to change the default settings for your Ricoh Printer driver when printing using an Apple Mac computer.
You will need to have already downloaded the Ricoh printer driver from the website. Downloading the latest Ricoh printer driver for your Ricoh Printer / Ricoh Multifunctional Printer will ensure the most reliable printing results. You can download the latest Ricoh printer drivers using the links in our Driver Download tutorial.
You will also need to have installed the printer driver. You can install the Ricoh printer driver by following our Adding a Ricoh Printer Driver (MAC) tutorial.
In this guide, we will be using the Ricoh MPC6502 as the example, please follow this guide using your own Ricoh printer model in place of the example in Step 3.

STEP 1 - Goto Localhost:631/printers
Open a web browser and in the address bar enter:
Localhost:631/printers
If Web Interface is Disabled (see below) continue with Step 2 below, if it is enabled you should see the screen as displayed at the start of Step 3

STEP 2 - Enabling CUPS Printer Interface for Mac
CUPS is a network printing service used by Mac computers. It allows you to set up your printers on a network, and customise printer options.
First off, go to http://localhost:631/printers/ .
A screen will appear saying ‘Web Interface is Disabled’
To enable CUPS:
2.1 Select and copy ‘cupsctl WebInterface=yes’

2.2 Next, click the magnifying glass in the top right-hand corner of your screen and search for 'Terminal'.

2.3 Once in the terminal, paste in 'cupsctl WebInterface=yes' and click enter.

Now you should be able to go to http://localhost:631/printers/ and see your installed printers.

STEP 3 - Choosing the printer
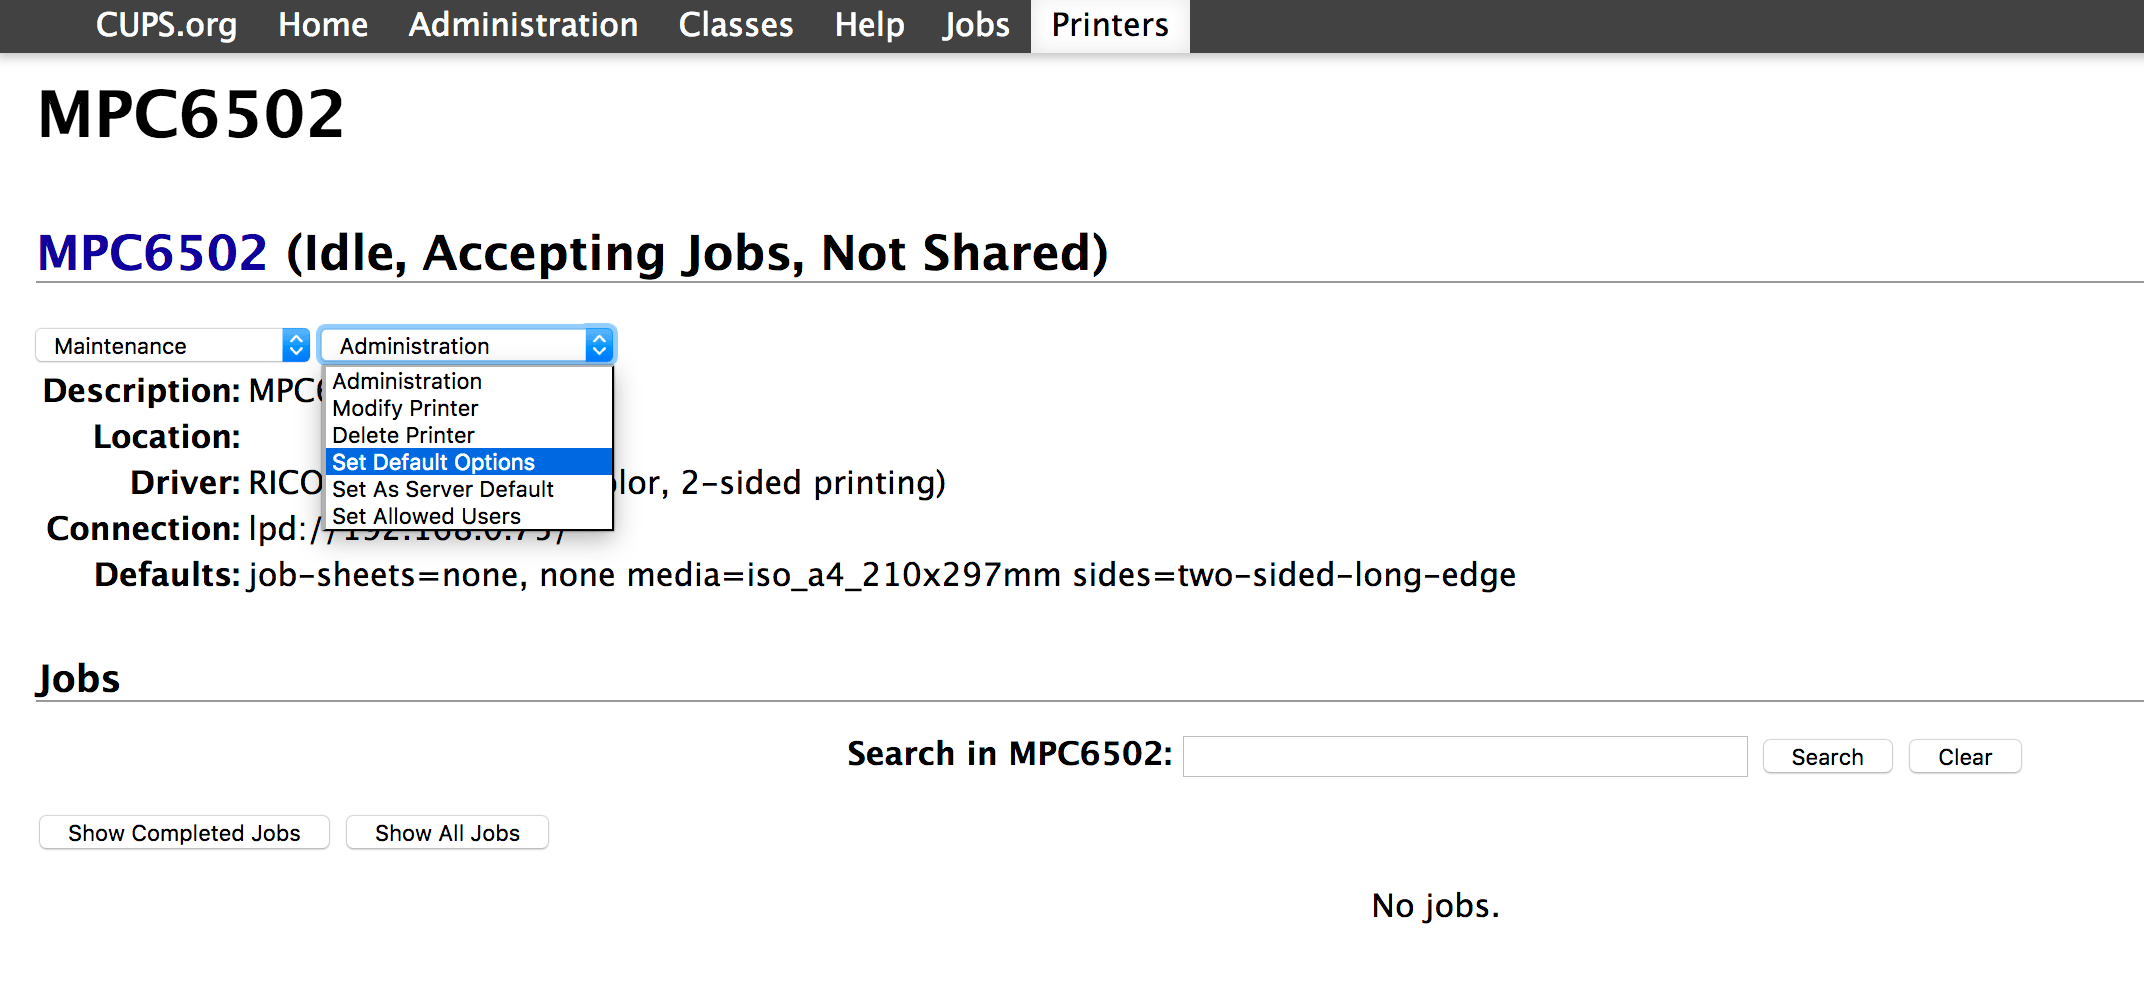
In the webpage that opens, choose the printer that you want to edit

STEP 4 - Set Default Options
From the drop-down ‘Administration Menu’ menu, choose ‘Set Default Options’

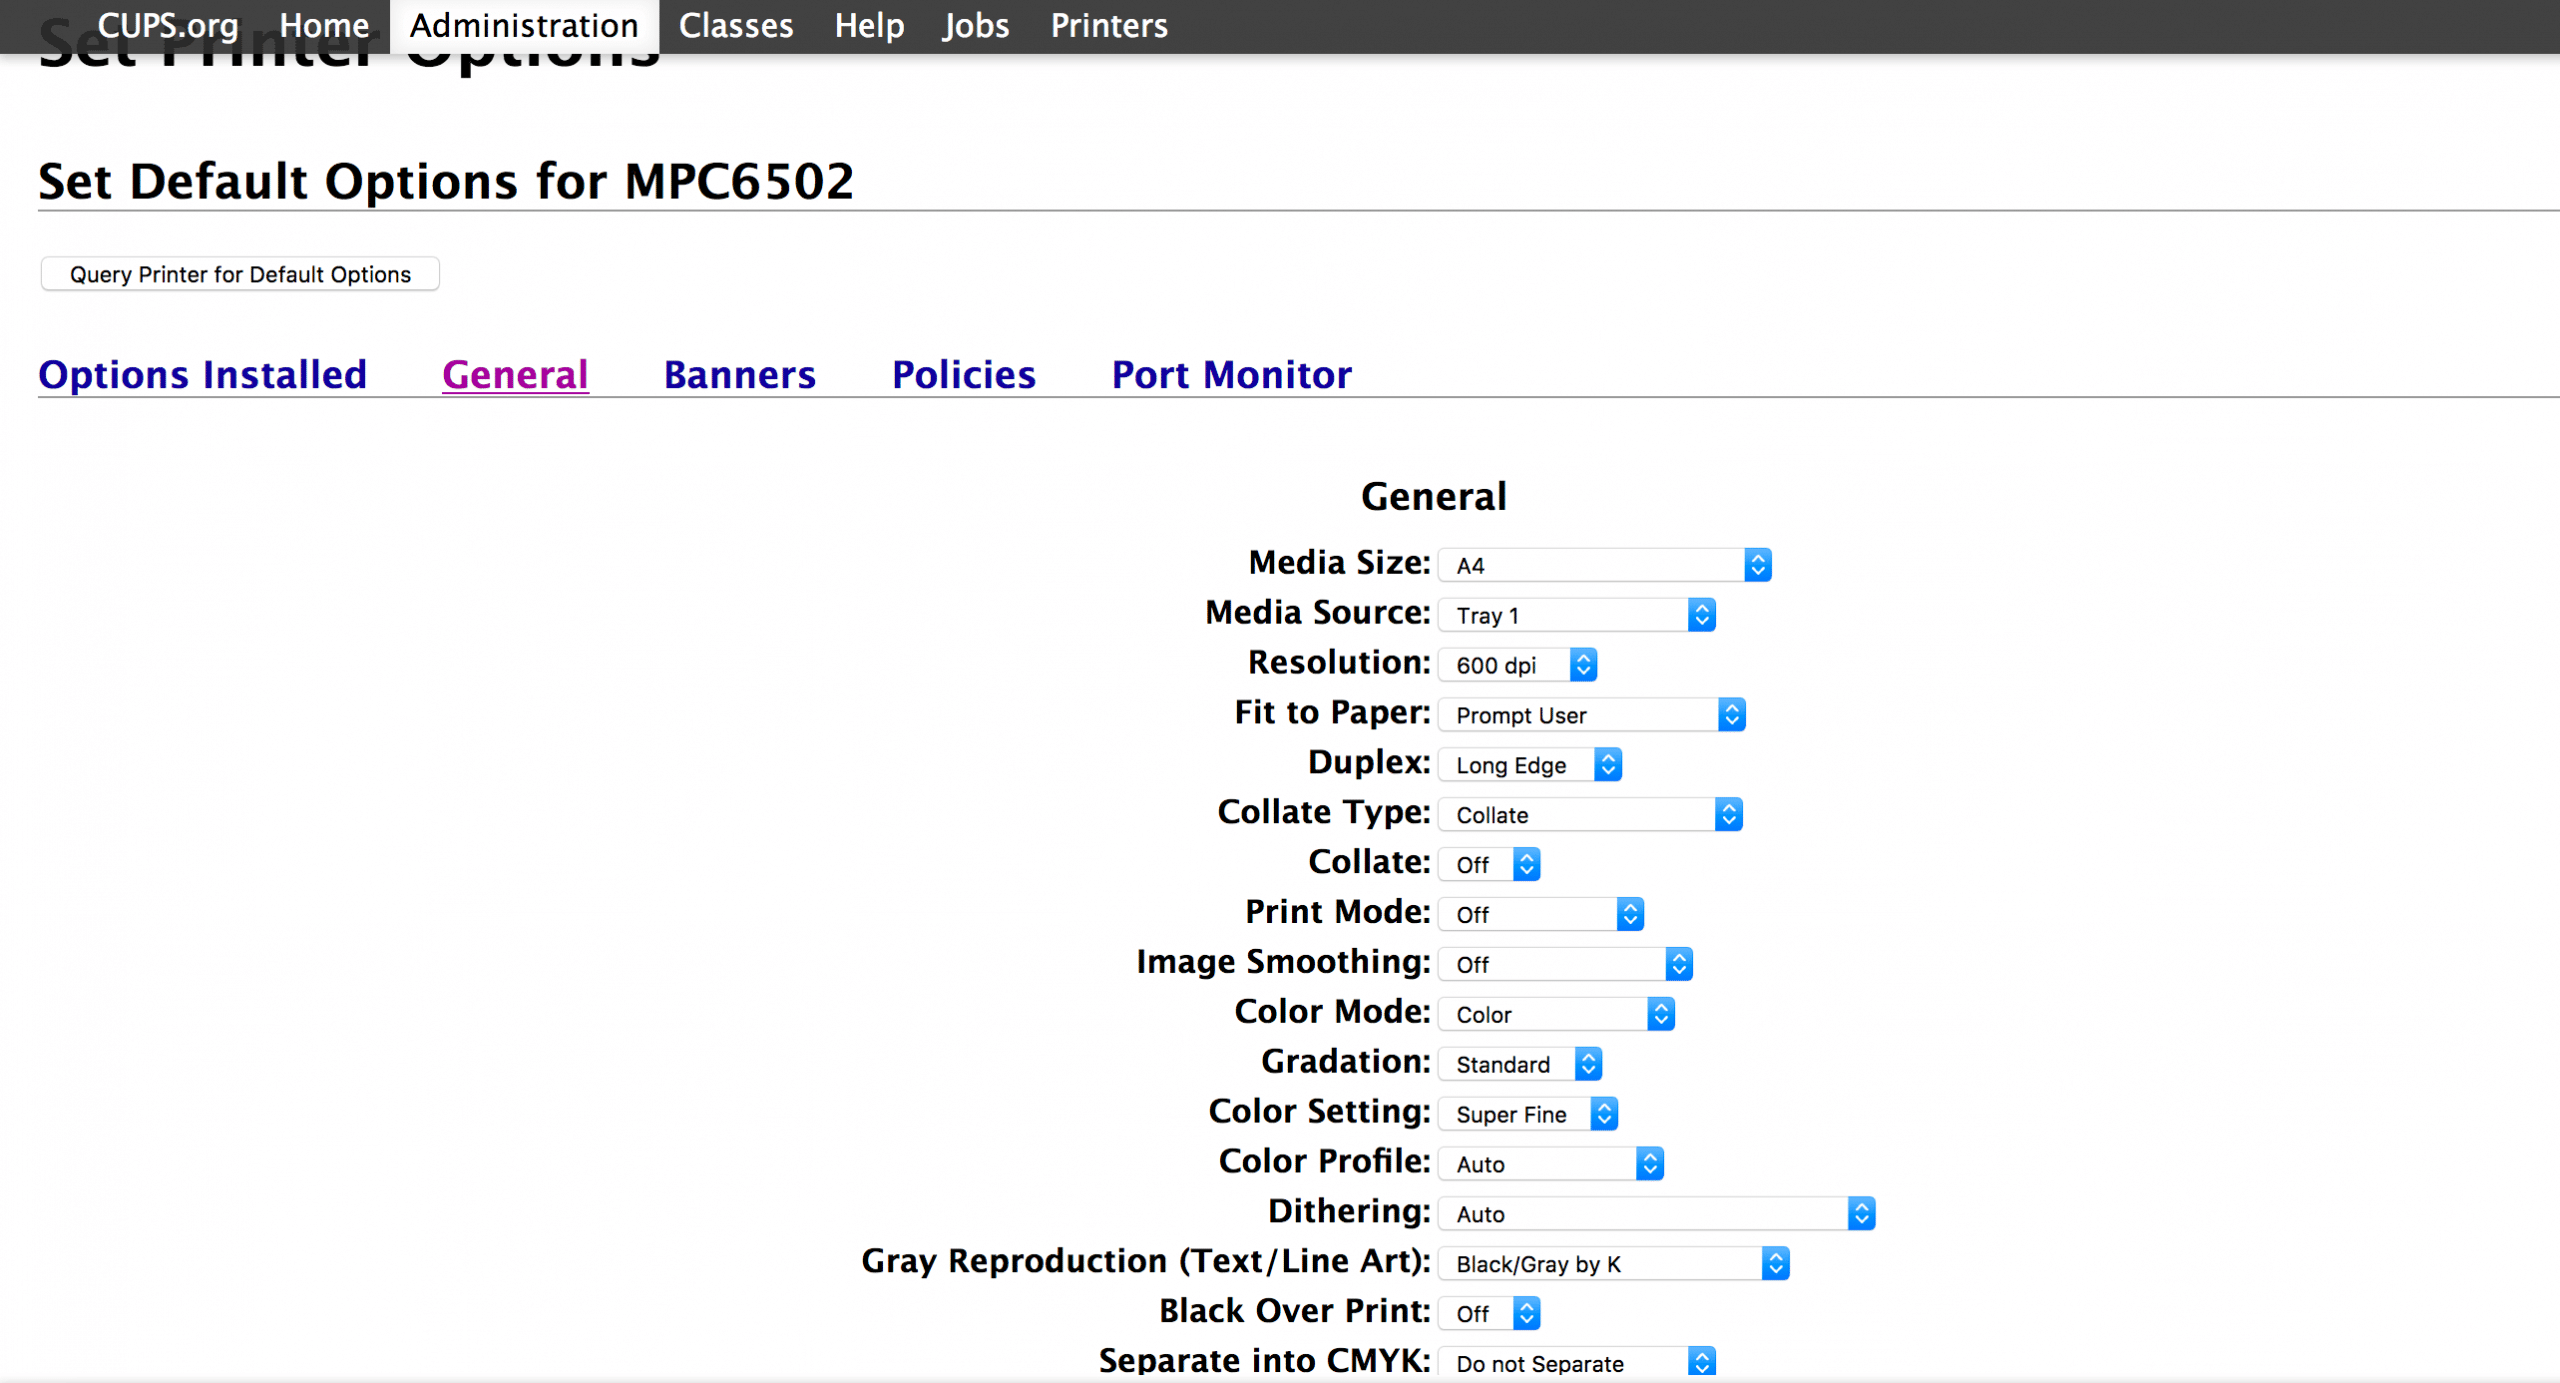
STEP 5 - Customise the Printer
In the below example, we have changed our default colour setting to Black & White (10th down in the list).

In the below example, we have changed our default colour setting to Black & White (10th down in the list).

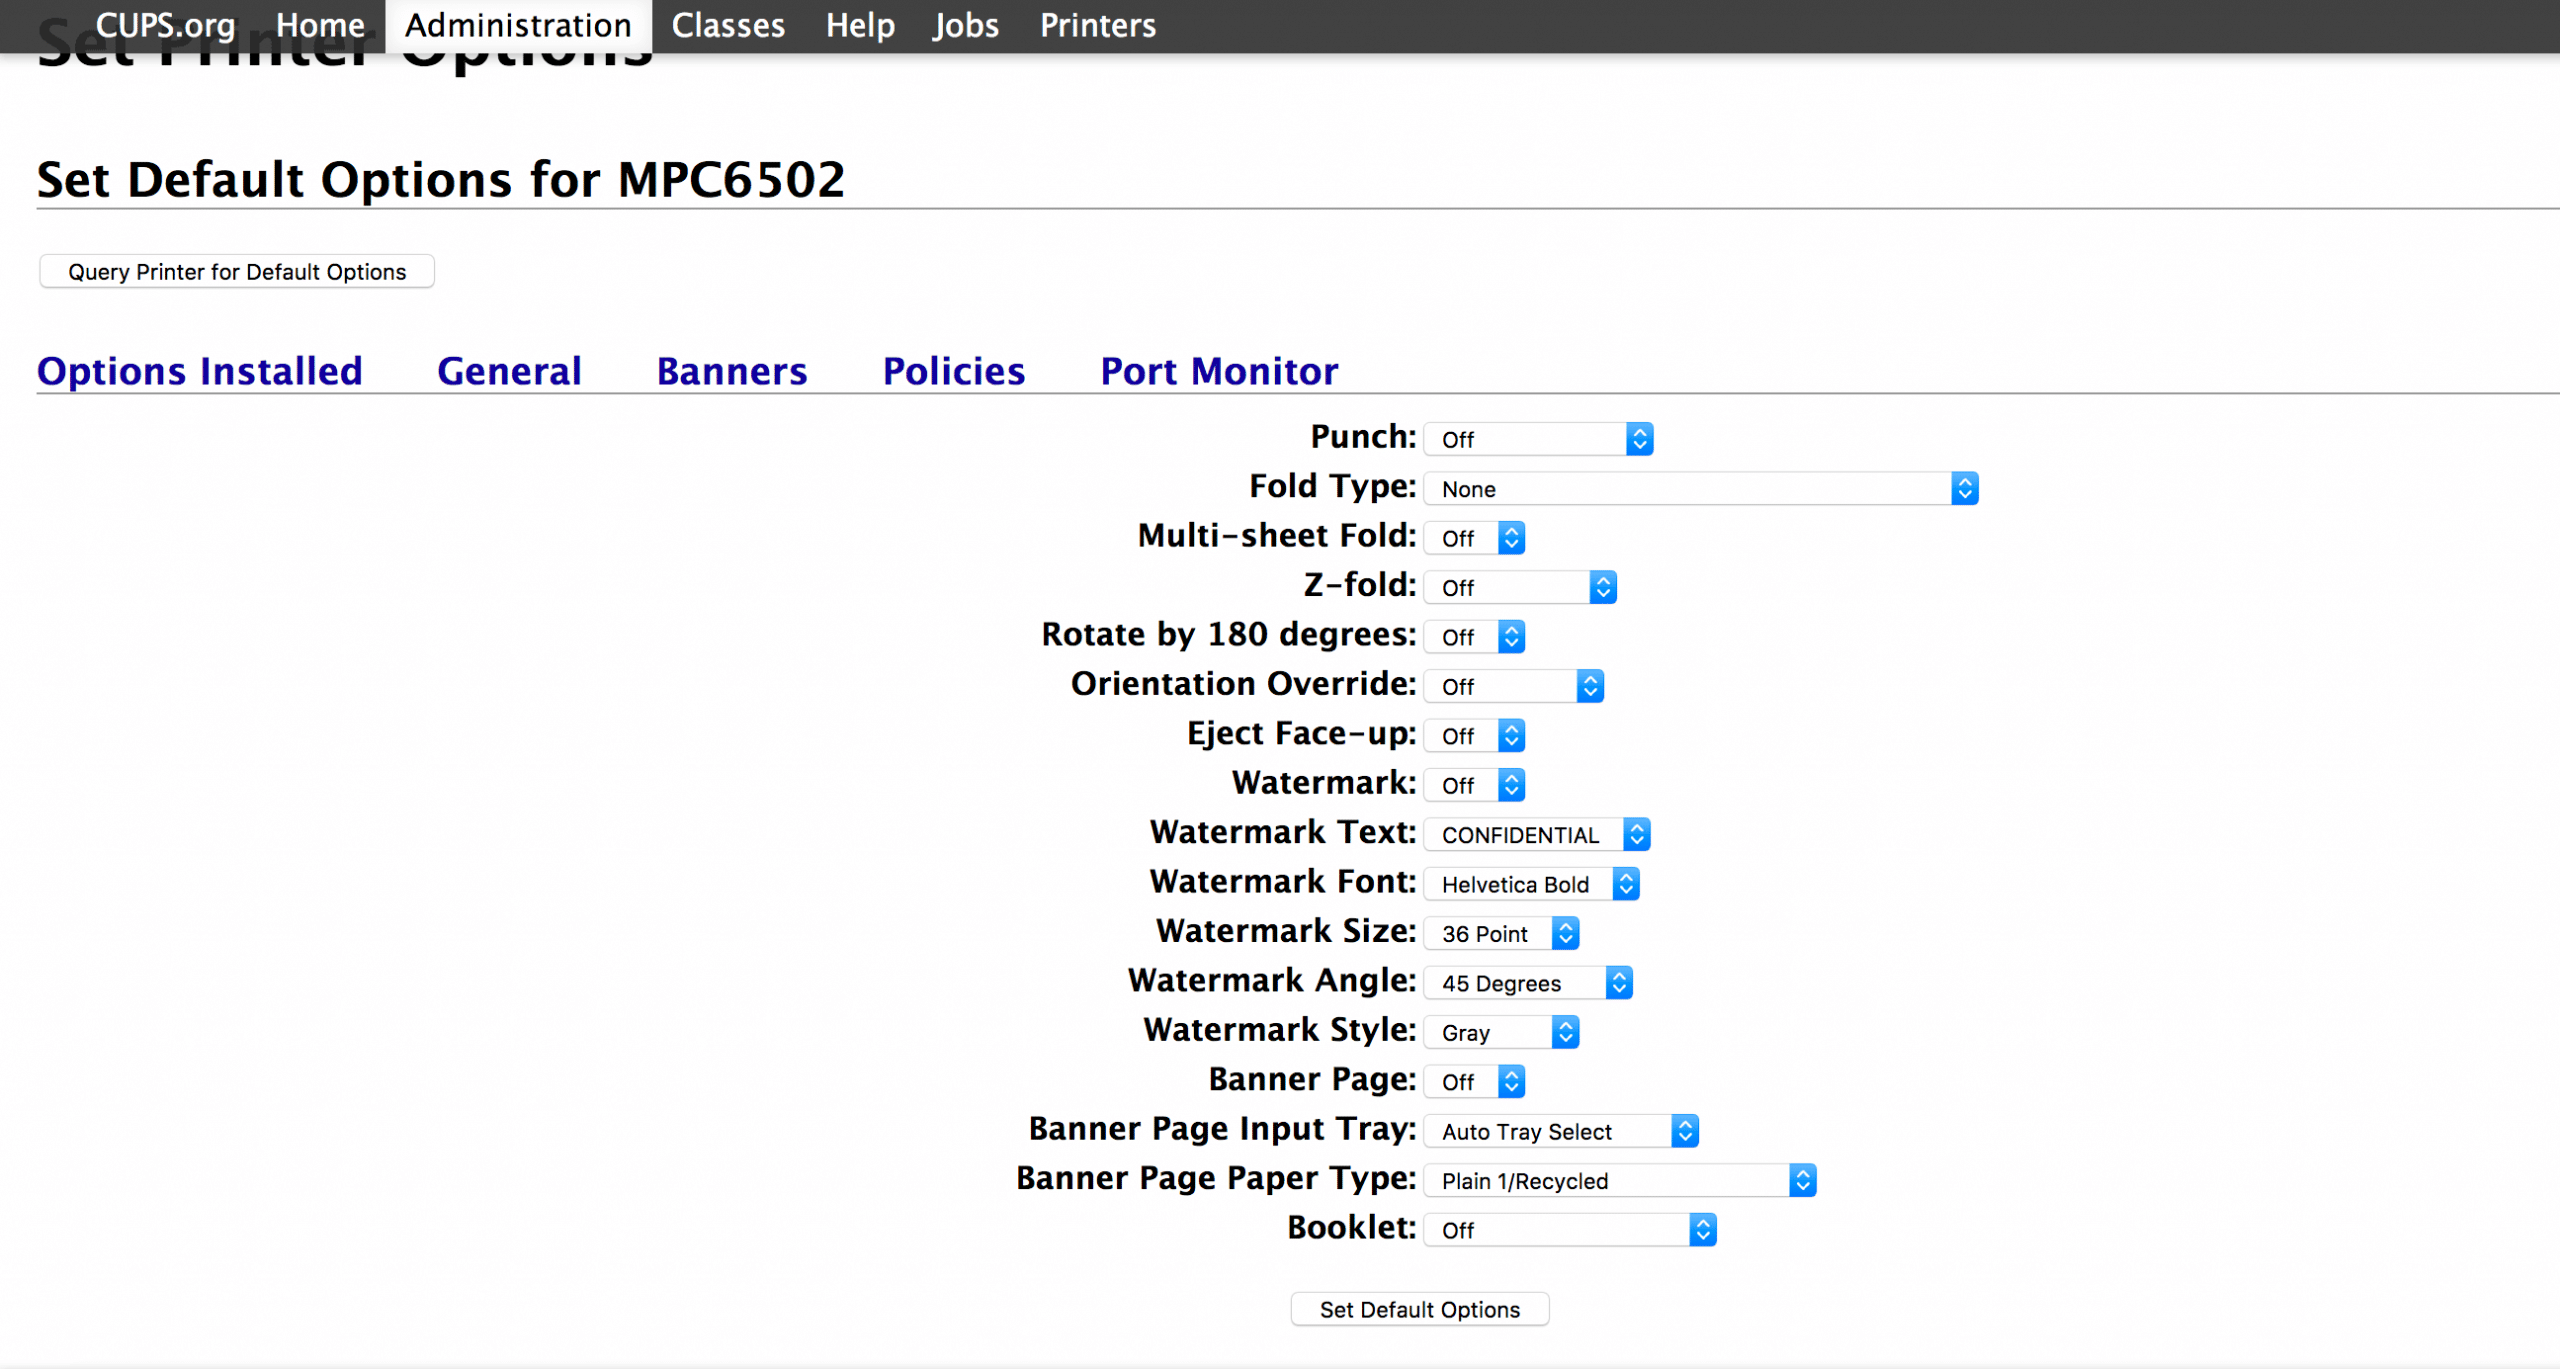
STEP 6 - Save the settings
You now need to save the settings by scrolling down to the bottom of the list and clicking on 'Set Default Options'.
TIP
If at any point you are prompted to put in a username and password, this is your Mac password, the same one you would use when installing any software.

